Written by SOWLE RV
October 22, 2019
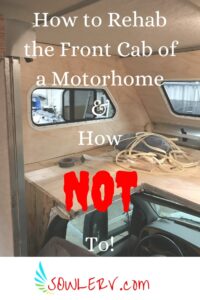
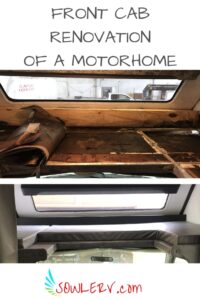
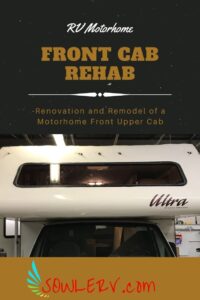
How to Rehab the Front Cab of a Motorhome
We bought this motorhome thinking it may have a little water damage in the corners. We never imagined we would be doing a Front Cab Rehab of a Motorhome! Before I get into the details of the Front Cab Rehab, I need to give a big shout out to my Father-In-Law for helping me with this project. Without him I would still be trying to get this Motorhome back together. “PawPaw Tom” (as you all know him) thank you for helping me with everything I ever need. Even with your struggles while I was working on this project you were there for me. Thank you.
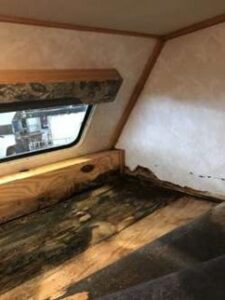
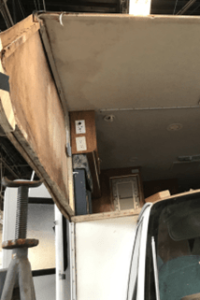
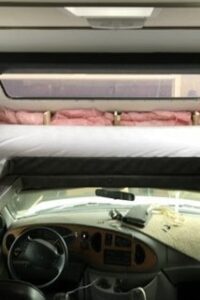
Here is a photo of the most damaged area and what it looked like when we bought it. It appears to have some water damage, but nothing too bad…
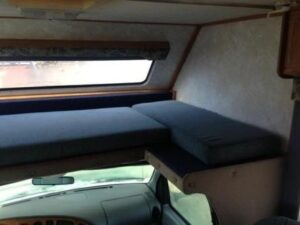
How we bought it

Inspection
Once we got it home and truly inspected it we realized the water damage was much more than what we had thought, (and much more than the people we bought it from told us) but we were already invested in it so decided to move forward on the project. I wanted to find out how bad the damage to the interior was.
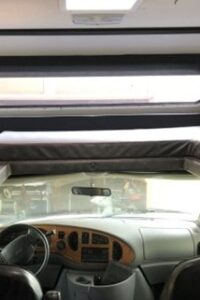
I removed the trim in the upper cab. Once I started removing the trim, it was obvious the damage was much more extensive than anticipated.
Finding Additional Damage while re-trimming
Finding additional damage while de-trimming
“It Has Never Leaked While We Have Owned It”
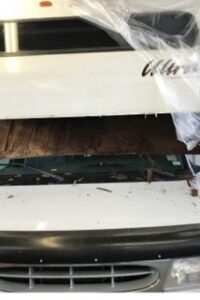
The prior owner’s words were “it has never leaked while we have owned it”. But when I got the trim off, we realized someone had already covered up the prior water damage with new wood in the front!
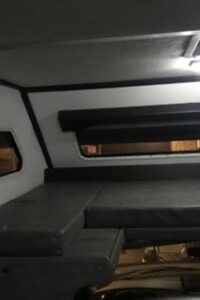
Previous Owners “fix”(the white paneling covered it up before we started pulling it off)
What was behind their white covered up paneling
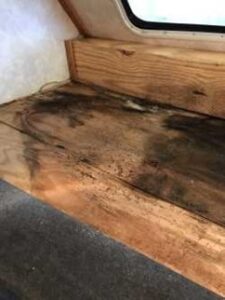
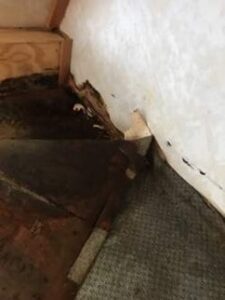
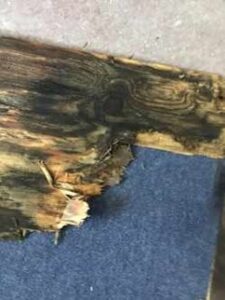
Once I removed THAT wood, I discovered the inner layer was not only rotted out, but it was also STILL WET!
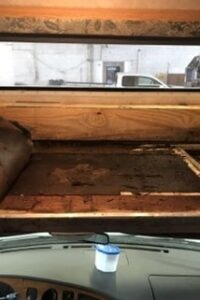
See the wood piece right up front and center? Inside of this piece of wood was the following 2 photos “destroyed bunk”
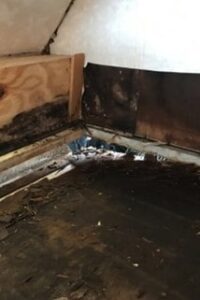
Destroyed Bunk 1

Destroyed Bunk 2
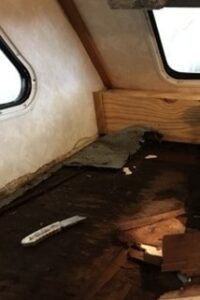
Even More Destroyed Bunk 3
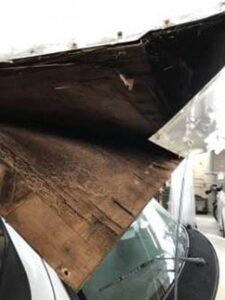
Destroyed Bunk 4 (Exterior Cab)
Front Cab Rehab
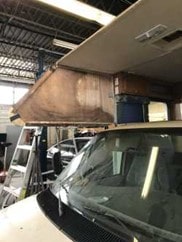
The more I disassembled, the more damage I found. When I got to the bunk that you lay on, I realized it was completely rotted out. The only way I could get to fix it was to remove the lower fiberglass that sits above the windshield of the van.
More Destroyed Bunk (Exterior)
Once I lowered it down, I found out there was no chance of remodeling the lower bunk of the cab with it in the RV.
Now I knew I had to pull off the front cap from the roof all the way down to the fiberglass lower piece.
Bunk Removed

Where is the Moisture Coming From?
Once I had the outer side trim off, I could see where moisture was getting in and rotting out the inner and outer laminate wood of the camper walls.
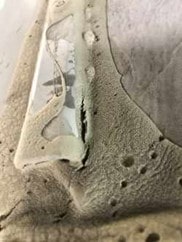
Biggest part of the leak causing us to replace the front cab. (Yes, it’s that small slit you see there). Crazy, right?
I had to de-trim the complete interior of the overhead bunk area to get access to remove the aluminum lower frame.
Once everything was removed, I realized I would be replacing every component on the sides, bottom, and front other than the aluminum framework that was reusable.
Some of the front of the cab removed
Research
I spent ALOT of time researching how to rebuild the lower bunk and how to parent this from happening to us again. A lot of articles told me to remove the windows in the upper cab area (because they could create another entry point for water) and make new panels that would enclose the whole upper cab. However, we enjoy the scenery and sunlight too much to do that.
My Plan
I decided to rebuild with the existing style and layout it had to keep the scenery aspect.
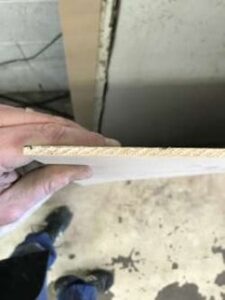
First, I went out and bought 1” foam and 1/4” and 1/2” treated plywood for the insulation and “wooden curve” of the front of the Motorhome. I also picked out 5 millimeter underlayment as well as 2.7 millimeter underlayment to rebuild the upper cab base.
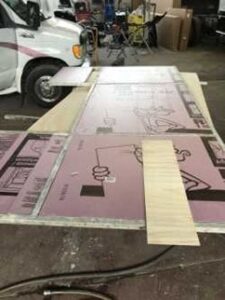
Foam and Frame
Underlayment
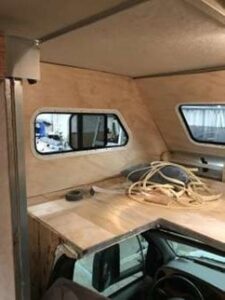
The base required an intensive cleaning. I cut all new 1” insulation to go in between the top and bottom upper cab base. When this was ready, I used a multipurpose glue to bond all of the components back together to be structurally sound.
Next, I focused on the forward cab section that had the large, wide window. This was a little more difficult because it required not only the outer shell with the foam, it also required making the window opening out of the marine-grade plywood.
Once the front was ready for the window cut-out, i moved to the sides. This part sucked and required special dust masks because I had to get all of the wood particles off of the fiberglass outer skin in order to get it to adhere to the new laminate I was installing.
Work in Progress
I used as many of the old pieces of material to make patterns for the remodel as I could. A lot of it was just pure trial and error.
I had to make my own clamps for attaching the side laminate to the aluminum frame and Styrofoam. Additionally, I had to come up with ideas to clamp the front caps from side to side.
Finally, I felt confident all the inner structure was back together and fit, so I put the front skin back on the motorhome. With it back in place, I could start to put all the side trim back in place.
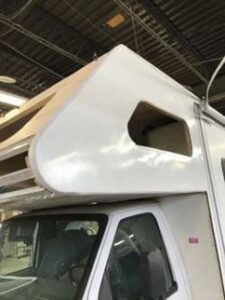
Front back together and glued.
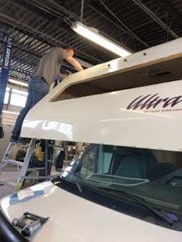
In progress
More Progress
Manufacturer Uses One Product, It Leaks, I Use A Different Product
However, I didn’t feel comfortable with that because the manufacturer uses Butyl Caulking (RV Putty Tape) on almost all RV’s. This will eventually leak no matter what because of the exposure to heat and cold (expansion and contraction). It will eventually create a hole in the caulking and LEAK AGAIN. NO THANK YOU!
More Research
Not wanting to go back with a design that I know is going to fail (LEAK), I started researching alternative solutions.
What I found is DICOR SEAL-TITE CORNER SEAL KIT.
It seals between every panel that meets together at a 90° and creates a bond between the 2 panels. Then I used the AK fix from the kit to run a “ceiling bead”. I then installed all of the corner moldings for the front cap.
Best Guarantee I Could Get
This repair should help guarantee that with vigilant, preventative maintenance, we should never have a water leak on these edges.
While getting ready to seal the seem from the front cap to the roof, I noticed I had ANOTHER issue with the roof itself! Ugh!!!! I will write about this coming up in a future article!
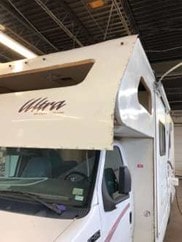
For now, I replaced the upper cap channel using the AK fix as the lower bond. I then used Dicor Self-Leveling Lap Sealant to properly seal the edges of that molding.
Next, I used the AK Fix to install the front and side window of the upper cab area. This got me water-tight to be able to bring the motorhome home from the shop where I had been working on it indoors, to begin working on the interior details.

Windows Replaced
More Progress
All I had left to do was install the insulation in the front cap, install the new plywood at the front lower edge, and install trim for all of the corners where the wood was replaced and then we could focus on the rest of the remodel.
End Result above drivers seat.
Across the Front End Result

Interior End Result

Exterior End Result
Conclusion of How to Rehab the Front Cab of a Motorhome
That is the conclusion of How to Rehab the Front Cab of a Motorhome. We hope that you don’t have to do this to this extent, but if you do, we wish you good luck! Share photos with us of your progress if you do. Just simply go to SOWLE RV.com and then to the Contact Us page.


RV Camping: Renovation, Remodel, and Makeover Articles you don’t want to miss on SOWLERV.com!
Renovation, Remodel, and Makeover, OH MY!
How to do an RV Bathroom Renovation and Remodel
How to Do an RV Bedroom Makeover in 7 Easy Steps
How to Do an RV Living Room Makeover in 8 Steps
How to Do an Easy RV Kitchen Makeover
How to Replace RV Awning Material in 5 Safe Steps
How to Remove Ugly Stains from Your RV Fabric Ceiling [with photos]
How to Remove and Replace the Flooring in Your RV Camper Trailer
Front Cab Rehab of a Motorhome
12 Steps to Replace a Destroyed RV Roof [detailed photos included]
Related Articles
![Purchasing Private RV Camping Land: 3 Important Steps to Follow from Our Experience [SOWLE Journeys of Faith]](https://sowlerv.com/wp-content/uploads/2024/05/Private-RV-Camping-Land-3-Important-Steps-to-Follow-for-Finding-and-Purchasing-From-Our-Experience-SOWLE-RV-FI-min-400x250.jpg)
Purchasing Private RV Camping Land: 3 Important Steps to Follow from Our Experience [SOWLE Journeys of Faith]
Private RV Camping Land: 3 Important Steps to Follow for Finding and Purchasing From Our Experience [SOWLE Journeys of Faith] Exploring the Benefits of Owning Your Own Private RV Camping Land Owning Your own private RV camping land offers a unique blend...

The Ultimate Guide to Finding the Perfect TV for Your RV
The Ultimate Guide to Finding the Perfect TV for Your RV Whether you just bought an RV and are needing to purchase an additional TV for the bedroom or purchased a used RV that didn’t include a TV, deciding between the numerous brands, styles, and options that are...
7 Reasons Why THIS is the Best Portable Barbecue Grill for RV Camping!
7 Reasons Why THIS is the Best Portable Barbecue Grill for RV Camping! We needed to purchase a new Portable BBQ Grill to use with our Motorhome for when we get to go RV Camping again. We researched MANY barbecue grills trying to find the best barbecue grill for RV...